


Windows update error 0x80070643 is one of the most frustrating installation failures users encounter on both Windows 11 and Windows 10. The code translates to “ERROR_INSTALL_FAILURE” and typically appears when a cumulative update or feature pack refuses to install, often showing the message “There were problems installing some updates” followed by 0x80070643.
In 2026, with Windows 11 version 25H2 widely deployed, this error continues to affect thousands of PCs — especially during major security or .NET-related updates. The good news? It’s almost always fixable with built-in tools and a few targeted steps. This guide gives you clear, tested solutions that work right now, without needing third-party software or risky registry edits.
What Causes Windows Update Error 0x80070643 on Modern Windows Systems
The error usually stems from one of four root issues that Microsoft has documented across multiple knowledge base articles:
- Insufficient space or corruption in the Windows Recovery Environment (WinRE) partition — the most common culprit for recent KB updates.
- Problems with the .NET Framework (missing, corrupted, or outdated components required by many updates).
- Glitched Windows Update services or damaged system files.
- Interference from antivirus software (including outdated Windows Defender definitions).
Understanding the exact trigger helps you apply the right fix faster instead of trying everything randomly.
How the WinRE Partition Became a Major Trigger in 2025–2026 Updates
Microsoft confirmed that certain cumulative updates (including patches released in early 2025 and carried into 2026) need extra space in the hidden Recovery partition. When it’s under 250 MB free, the installer fails with 0x80070643. This issue became more noticeable after the Windows 11 24H2 and 25H2 rollouts.
Quick Preparation Steps Before Fixing Windows Update Error 0x80070643
Before diving into repairs, spend two minutes on these basics:
- Restart your PC and try checking for updates again.
- Ensure you have at least 20 GB of free space on the C: drive.
- Plug in your laptop and connect to a stable Wi-Fi or Ethernet connection.
- Create a quick System Restore point (search for “Create a restore point” in the Start menu).
These steps resolve the error for some users and make the deeper fixes more reliable.
Method 1 – Run the Windows Update Troubleshooter First
Microsoft’s built-in troubleshooter is the official first step and fixes the issue for many people in 2026.
- Open Settings → System → Troubleshoot → Other troubleshooters.
- Find Windows Update and click Run.
- Follow the prompts and apply any recommended fixes.
- Restart and check for updates again.
This tool automatically resets services and clears minor cache problems.
Method 2 – Restart and Reset Windows Update Services
Corrupted service states are a frequent hidden cause.
Open Command Prompt as Administrator and run these commands one by one (press Enter after each):
text
net stop wuauserv
net stop cryptSvc
net stop bits
net stop msiserver
ren C:\Windows\SoftwareDistribution SoftwareDistribution.old
ren C:\Windows\System32\catroot2 Catroot2.old
net start wuauserv
net start cryptSvc
net start bits
net start msiserver
Restart your PC afterward. This clears the update cache without losing any important data.
Method 3 – Repair System Files with SFC and DISM Commands
Damaged system files often trigger 0x80070643.
In an elevated Command Prompt, run:
- sfc /scannow (wait for 100% completion).
- DISM /Online /Cleanup-Image /RestoreHealth (this may take 10–20 minutes).
These two commands repair the Windows image and underlying files that updates depend on.
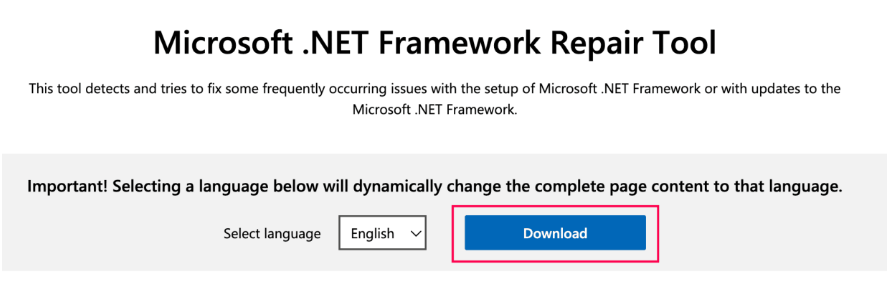
Method 4 – Repair or Reinstall the .NET Framework
Since many updates rely on .NET components, a quick repair often solves the problem instantly.
- Download the official Microsoft .NET Framework Repair Tool directly from Microsoft’s website.
- Run it and let it scan and fix any issues.
- Alternatively, go to Settings → Apps → search for “.NET Framework” and repair any listed versions.
After repairing, restart and retry Windows Update.
Method 5 – Extend the Windows Recovery Partition (The Most Effective 2026 Fix)
This is the solution Microsoft officially recommends for the WinRE-related variant of 0x80070643.
- Open Command Prompt as Administrator.
- Run reagentc /disable.
- Run diskpart, then list disk, select disk 0 (choose your main drive), list partition, and identify the Recovery partition (usually around 500–1000 MB).
- Use the commands to shrink the main partition slightly and extend the Recovery partition by at least 250–500 MB (detailed step-by-step scripts are available in Microsoft’s KB5028997 guidance).
- Run reagentc /enable when finished.
Many users report this single change instantly resolves the error for stubborn updates.
Method 6 – Manually Install the Failing Update from Microsoft Catalog
If automatic installation keeps failing:
- Note the exact KB number from the Windows Update history.
- Visit the Microsoft Update Catalog website.
- Search for the KB number and download the correct version for your system (x64 or ARM64).
- Double-click the .msu file to install it.
This bypasses the normal Windows Update engine entirely.
Advanced Steps When Windows Update Error 0x80070643 Persists
If the above doesn’t work:
- Temporarily disable third-party antivirus or firewall.
- Perform a clean boot (search “msconfig” → Services → Hide all Microsoft services → Disable all).
- Use the Windows Update Assistant (Installation Assistant) from Microsoft’s official Windows 11 download page for a full feature update.
These steps resolve even the most stubborn cases reported in 2026.
Preventing Windows Update Error 0x80070643 from Returning
Keep these habits to avoid repeat issues:
- Regularly check and extend the WinRE partition before major updates.
- Keep .NET Framework and Windows Defender definitions current.
- Run monthly SFC/DISM maintenance.
- Avoid interrupting updates mid-installation.
Conclusion
Windows update error 0x80070643 may feel impossible to fix when it first appears, but in 2026 it’s usually caused by a handful of well-documented issues — most commonly the Recovery partition size or .NET Framework problems. By following the structured methods above (starting with the troubleshooter and moving to the WinRE resize if needed), the vast majority of users successfully install their pending updates and restore normal operation.
Take it one step at a time, restart after each major fix, and you’ll be back on the latest secure Windows version quickly. Microsoft continues to refine these tools with every feature update, so staying current remains the best long-term protection against future errors.
Frequently Asked Questions
What does error code 0x80070643 actually mean?
It means “ERROR_INSTALL_FAILURE” — the update installer encountered a problem and could not complete the process.
Is 0x80070643 dangerous to my PC?
No. It only prevents the specific update from installing. Your PC remains usable, though it may miss important security patches until fixed.
Does this error only happen on Windows 11?
No — it affects both Windows 11 (especially 24H2/25H2) and Windows 10 users, though the WinRE partition fix is more common on newer builds.
Can I fix 0x80070643 without losing data?
Yes. All the methods in this guide are non-destructive and preserve your files, apps, and settings.
How do I know if the Recovery partition is the cause?
If the error appears consistently on the same KB update and other fixes fail, the WinRE partition is almost always the culprit.
Should I use third-party update tools to bypass this error?
No. Stick to Microsoft’s official methods and tools to avoid security risks or further system instability.
Will resetting Windows fix 0x80070643?
It can, but it’s a last resort. Try the targeted fixes first — they succeed for most users without a full reset.
How long does the WinRE partition resize take?
Usually 10–20 minutes, depending on your drive size and speed. It’s safe when following Microsoft’s exact steps.